一. 基本操作
1. 安装
https://github.com/huginn/huginn/blob/master/doc/manual/installation.md
安装mysql后查看密码:sudo cat /etc/mysql/debian.cnf,登录之后修改root密码
修改root密码:
update user set authentication_string=password(‘123456′) where user=’root’;
flush privileges;
修改以外部访问:
USE mysql;
SELECT ‘host’ FROM user WHERE user=’root’;
UPDATE user SET host = ‘%’ WHERE user =’root;
2. 文件夹路径
huginn-master\app\views\agents 是agent的页面
\huginn-master\app\views\agents\index.html.erb 是agent的主页前端页面
3. 修改配置文件
1. 修改/home/huginn/huginn/.env 配置信息,配置数据库等
2. 修改/home/huginn/huginn/Procfile 按照官方文档修改web 和 job
包含多线程和单线程功能,若多线程经常出现问题(threaded.rb占用cpu高),就调整为单线程
3. 修改/home/huginn/huginn/config/environments/ production.rb config.hosts << 本机IP地址
4. 修改server_name /etc/nginx/sites-available
修改/etc/nginx/site…./huginn server_name 为localhost也可以运行
5. 修改/home/huginn/huginn/config/unicorn.rb
6. 查看nginx日志 /var/log/nginx/
7. 查看huginn日志 /home/huginn/huginn/log/uricorn.log
4. 相关命令
sudo bundle exec rake production:restart 重启
sudo bundle exec rake production:force_stop 强制重启
sudo bundle exec rake production:export 导出
sudo bundle exec rake production:check 进行检查
sudo bundle exec rake production:start 开启
sudo bundle exec rails runner bin/threaded.rb 运行线程
5. 添加多个job工作者
在/etc/rc.local
| exec 2> /tmp/rc.local.log # send stderr from rc.local to a log file exec 1>&2 # send stdout to the same log file set -x # tell sh to display commands before execution# The rest of your script goes here cd /home/huginn/huginn ORES=`nproc` WORKERS=$(nproc –all)screen -dmS foreman foreman startfor i in `seq 1 ${WORKERS}`; do screen -dmS worker${i} bundle exec rake jobs:work doneexit 0 |
6. log文件查看
1. 查看/var/log/nginx 里面得log文件查看错误信息
2. 查看/home/huginn/huginn/log/unicorn.log 查看huginn错误信息 只包含 HTTP 请求日志条目
3. 查看/home/huginn/huginn/log/production.log 查看Rails 应用程序日志
4. 查看/home/huginn/huginn/log/*/current 如果您的代理之一未按预期执行,这些文件将包含错误消息或回溯。
7. huginn agent指令
提取未均匀格式化的 JSON
{
  "data": [
    {
      "message": "Happy Holidays everyone!\n\nI hope you'll all have a good time with family and friends!",
      "created_time": "2017-12-24T21:57:05+0000",
      "description": "From the Running in the Dark EP Get the EP at: https:\/\/timecop1983.bandcamp.com\/album\/running-in-the-dark-ep \u00a9 2016 Timecop1983 ------------------------ Foll...",
    },
    {
      "message": "My official Timecop1983 soundbank for TAL U-NO LX is still exclusively available at The Patchbay! \n\nIt's a collection of patches which i crafted myself for this amazing plugin and still use on a daily basis.",
      "created_time": "2017-12-18T12:32:34+0000"
    },
    {
      "message": "Falling Apart (feat. By an Ion)",
      "created_time": "2017-12-12T22:04:55+0000",
      "description": "Timecop1983 - Falling Apart (feat. By An Ion) from Lovers EP - Part II Get the EP at: https:\/\/timecop1983.bandcamp.com\/album\/lovers-ep-part-ii Follow By An I..."
    }
  ]
}
解决办法:
{
  "expected_update_period_in_days": "2",
  "url": "....",
  "type": "json",
  "mode": "on_change",
  "extract": {
    "data": {
      "path": "data[*]",
      "hidden": "true"
    }
  },
  "template": {
    "published_at": "{{data.created_time}}",
    "description": "{{data.description}}",
    "message": "{{data.message}}"
  }
}
WebsiteAgent接收事件处理
{
“expected_update_period_in_days”: “2”,
“data_from_event”: “{{ body | json }}”, 这里是重点,用data_from_event来处理
“type”: “json”,
“mode”: “on_change”,
设置代理
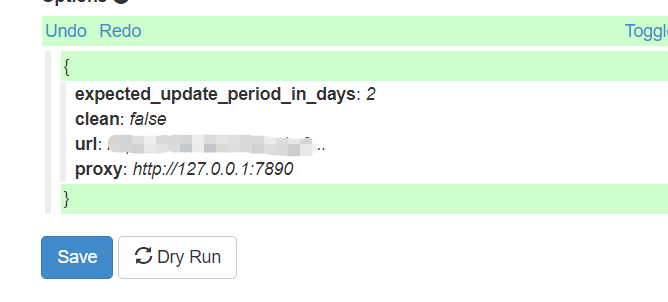
直接添加proxy:’http://127.0.0.1:port’即可

换行
添加:`{% line_break %}`
例如:paper_url: {{paper_url}} `{% line_break %}` samples_url: {{samples_url}}
二. 故障排查
官方故障查看:https://github.com/huginn/huginn/blob/master/doc/manual/installation.md#troubleshooting
1. 502错误
1. 查看各种log文件,查看相应错误。
2. 查看/etc/service 里面有huginn得job任务和web任务,尝试进入目录比如huginn-jobs-1 运行./run,查看相应错误,或者直接./run几次
3. 进入/home/huginn/huginn/ 执行sudo bundle exec rake production:check进行检查,或者sudo bundle exec rake production:stop(force_stop强制停止)
sudo bundle exec rake production:start ,停止重启几次,让huginn正常运行
2. mysql2
mysql2安装失败
缺少 dev library of mysql
On ubuntu
sudo apt-get install libmysqlclient-dev
On Red Hat/CentOS and other distributions using yum:
sudo yum install mysql-devel
On Mac OS X with Homebrew:
brew install mysql3. diagram不能显示

原因是huginn默认使用google api 的dot,特殊情况不能连接,解决方法是使用本地dot
- 查看本地是否存在 dot: which dot,如果没有按照说明安装graphviz
- 在/home/huginn/huginn/.env 中开启USE_GRAPHVIZ_DOT=dot
- 导出: sudo bundle exec rake production:export
4. 服务不执行,任务堆积
问题:一般因为服务已经运行了189081秒,也就是超过了49小时,导致服务超时停止了
方法1:手动
1. sv status huginn-job-1 查看服务状态
2. sv restart huginn-job-1 重启服务,如果发现返回timeout就强制重启
3. sudo sv force-restart huginn-jobs-1 强制重启
4. sudo sv force-stop huginn-jobs-1 强制重启
方法2:计划任务
crontab -e
0 0 * * * sudo sv restart huginn-jobs-1 (或者force-restart)
5. 修改任何文件后
每次更改 .env 或 Procfile 中的配置时,都必须重新导出 init 脚本!
或修改.env文件后,要执行 sudo bundle exec rake production:export
6. 重装mysql
卸载mysql
1.卸载mysql
sudo apt-get autoremove –purge mysql-server
sudo apt-get autoremove –purge mysql-server-*
sudo apt-get autoremove –purge mysql-client
sudo apt-get autoremove –purge mysql-client-*
sudo apt-get remove mysql-common
2.删除数据
dpkg -l |grep ^rc|awk ‘{print $2}’ |sudo xargs dpkg -P
注意,清楚的过程中会弹出几个窗口,内容大概是问你是否需要清除用户数据之类的,要选择yes!
3.删除目录
sudo rm -rf /etc/mysql sudo rm -rf /var/lib/mysql
4.清除残留
sudo apt autoremove sudo apt autoreclean
安装mysql
sudo apt-get install -y mysql-server mysql-client libmysqlclient-dev
sudo systemctl start mysql
sudo mysql_secure_installation 脚本 可以设置密码等
Securing the MySQL server deployment.

Connecting to MySQL using a blank password.

VALIDATE PASSWORD PLUGIN can be used to test passwords and improve security. It checks the strength of password and allows the users to set only those passwords which are secure enough. Would you like to setup VALIDATE PASSWORD plugin?

Press y|Y for Yes, any other key for No: n   不使用规则
Please set the password for root here.

New password: password

Re-enter new password:repassword

By default, a MySQL installation has an anonymous user, allowing anyone to log into MySQL without having to have a user account created for them. This is intended only for testing, and to make the installation go a bit smoother. You should remove them before moving into a production environment.

Remove anonymous users? (Press y|Y for Yes, any other key for No) : y 去除匿名

… skipping.


Normally, root should only be allowed to connect from ‘localhost’. This ensures that someone cannot guess at the root password from the network.

Disallow root login remotely? (Press y|Y for Yes, any other key for No) : n  不禁止远程连接
Success.
By default, MySQL comes with a database named ‘test’ that anyone can access. This is also intended only for testing, and should be removed before moving into a production environment.

Remove test database and access to it? (Press y|Y for Yes, any other key for No) : n

… skipping.
Reloading the privilege tables will ensure that all changes
made so far will take effect immediately.

Reload privilege tables now? (Press y|Y for Yes, any other key for No) : y  刷新
Success.

All done!
如果这个时候密码还是空的,就sudo mysql -u root进入mysql
use mysql;
select user,host,plugin from mysql.user;
会发现root 是有插件auth_socket的,同时root的host是%而不是localhost,这个时候将auth_socket修改为mysql_native_password:update mysql.user set plugin=’mysql_native_password’ where user=’root’;
然后将%设置为localhost:update mysql.user set host=’localhost’ where user=’root’;
然后设置密码:update mysql.user set authentication_string=PASSWORD(‘你要设置的密码’) where user=’root’;
FLUSH PRIVILEGES;
exit;
重新登录就可以使用密码了
重新登录后,建立用户huginn
CREATE USER 'huginn'@'localhost' IDENTIFIED BY 'huginn';
把所有权限都给root:GRANT all privileges ON *.* TO ‘root’@’localhost’; 就能远程登陆了
再设置远程登录:sudo vi /etc/mysql/mysql.conf.d/mysqld.cnf 注释掉127.0.0.1那行
再赋予权限:GRANT SELECT, INSERT, UPDATE, DELETE, CREATE, DROP, INDEX, ALTER, LOCK TABLES ON *.* TO ‘huginn’@’localhost’; 赋权限
7. 占用内存过高
尝试关闭多个代理,然后
sudo bundle exec rake production:restart 重启
看看哪个代理占用内存较高


